Creating
To define your tests using a custom template, please follow the steps below, numbered steps are illustrated with their repsective numbers on the screenshots:
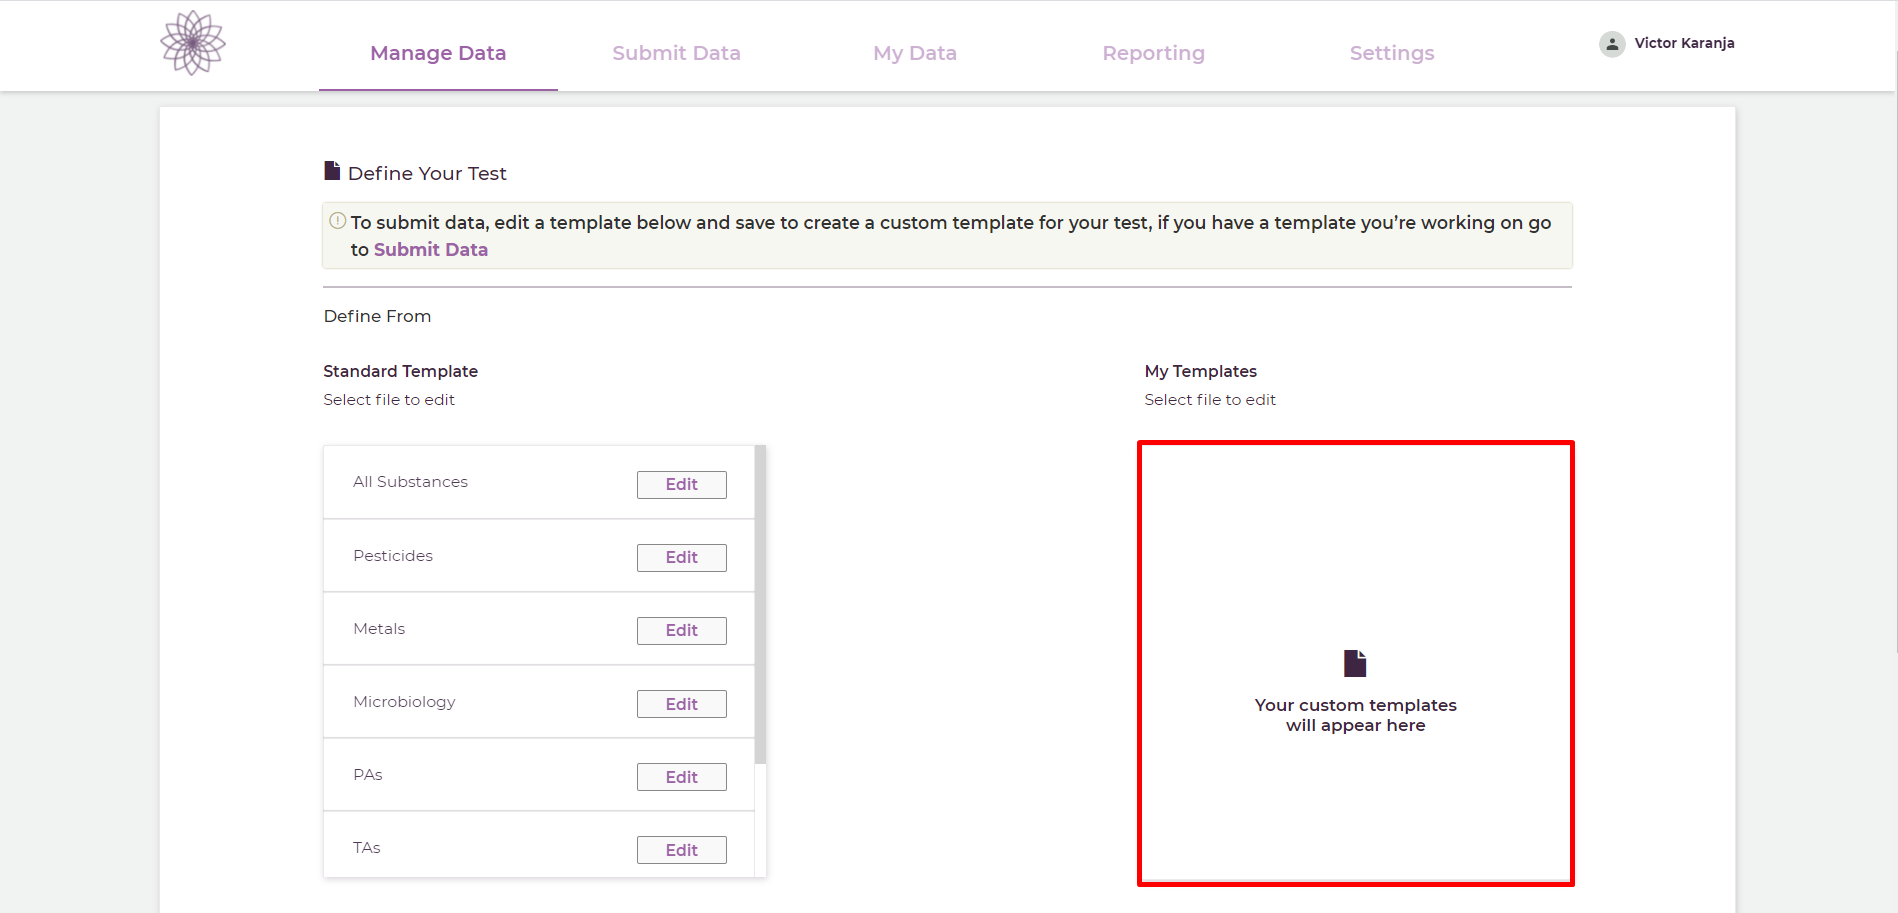
Manage Data#
- (1) Heading over to the Manage Data link on the navigation bar.
- (2) This is where you custom templates will appear.
Edit Standard Template#
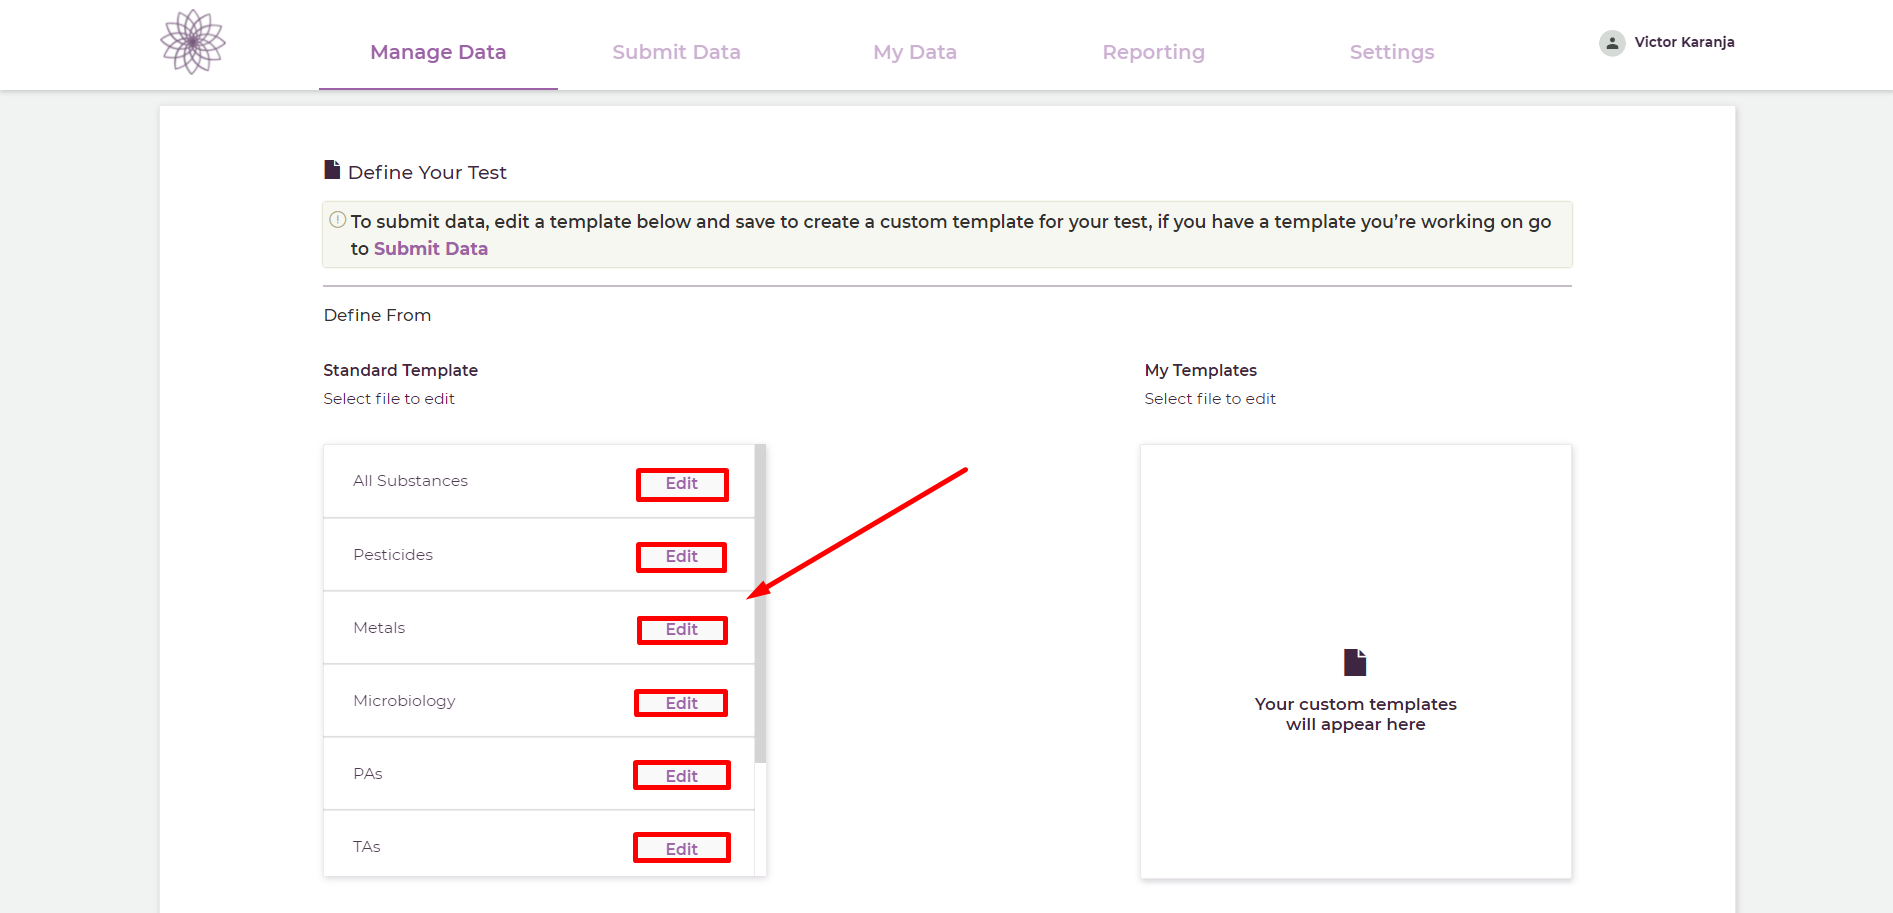
- (1) Click on the Edit button on one of the Standard Templates which contains substances that are in your test.
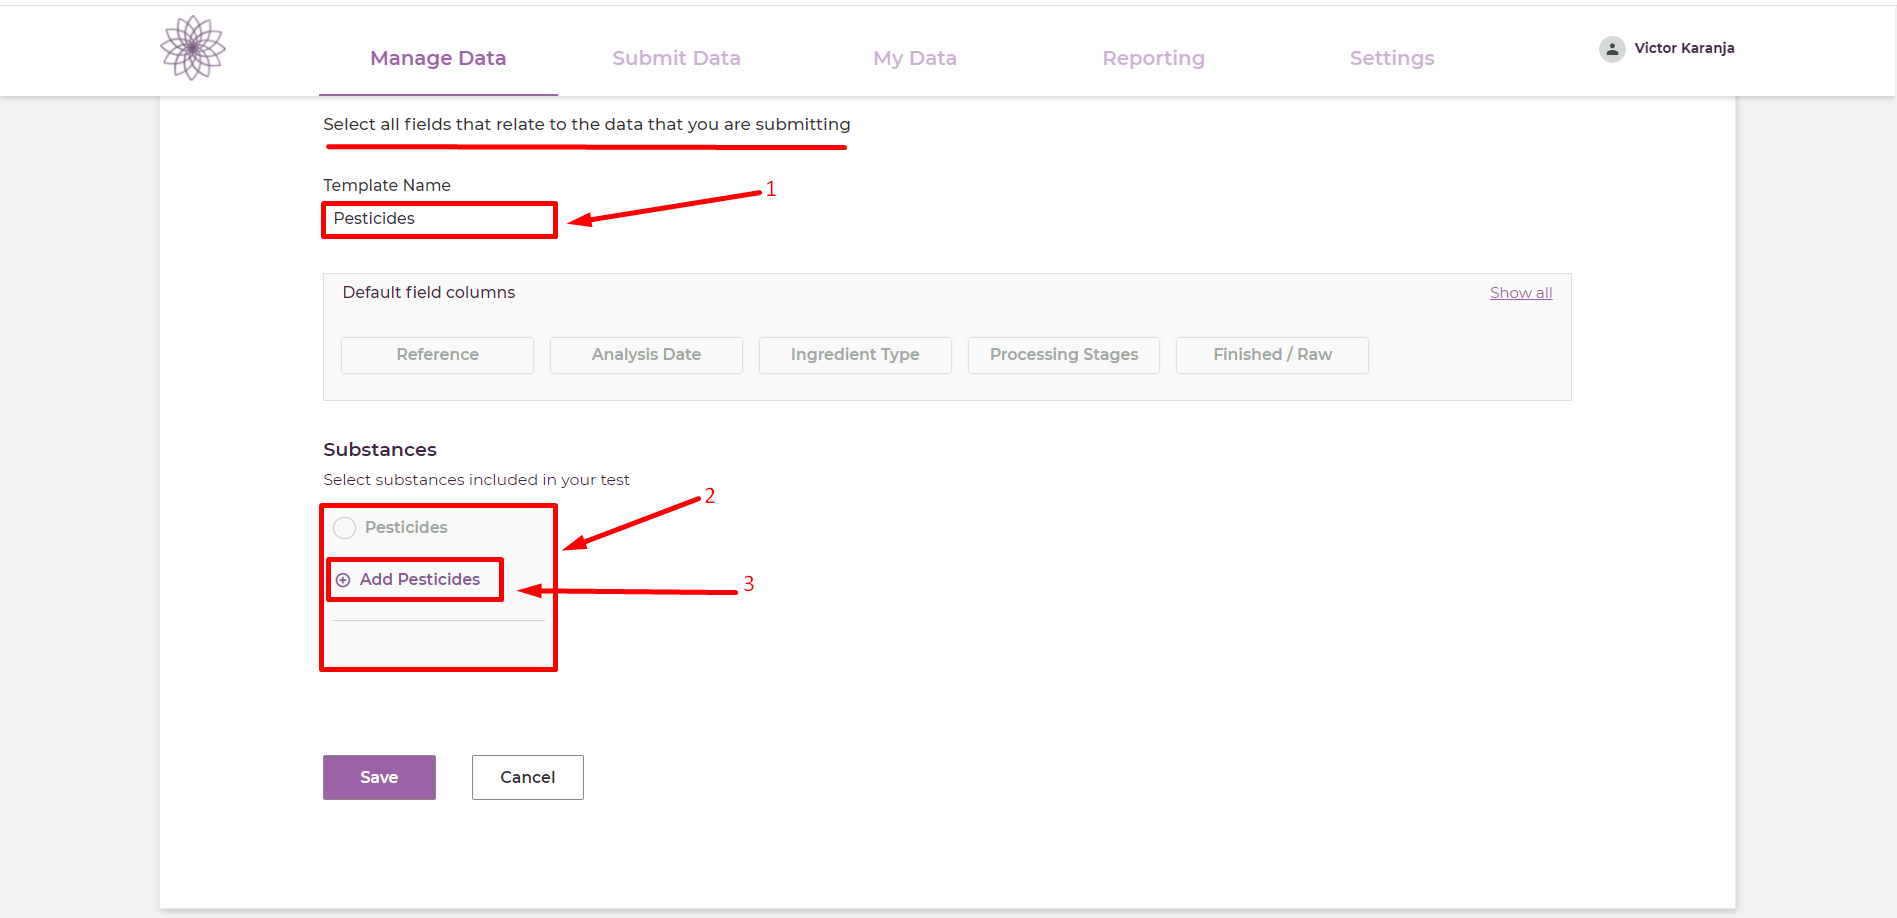
- (1) This is where you can name your custom template.
- (2) This is the section where the selected substances will appear.
- (3) Click on this button to open the substance selector modal.
Adding Substances#
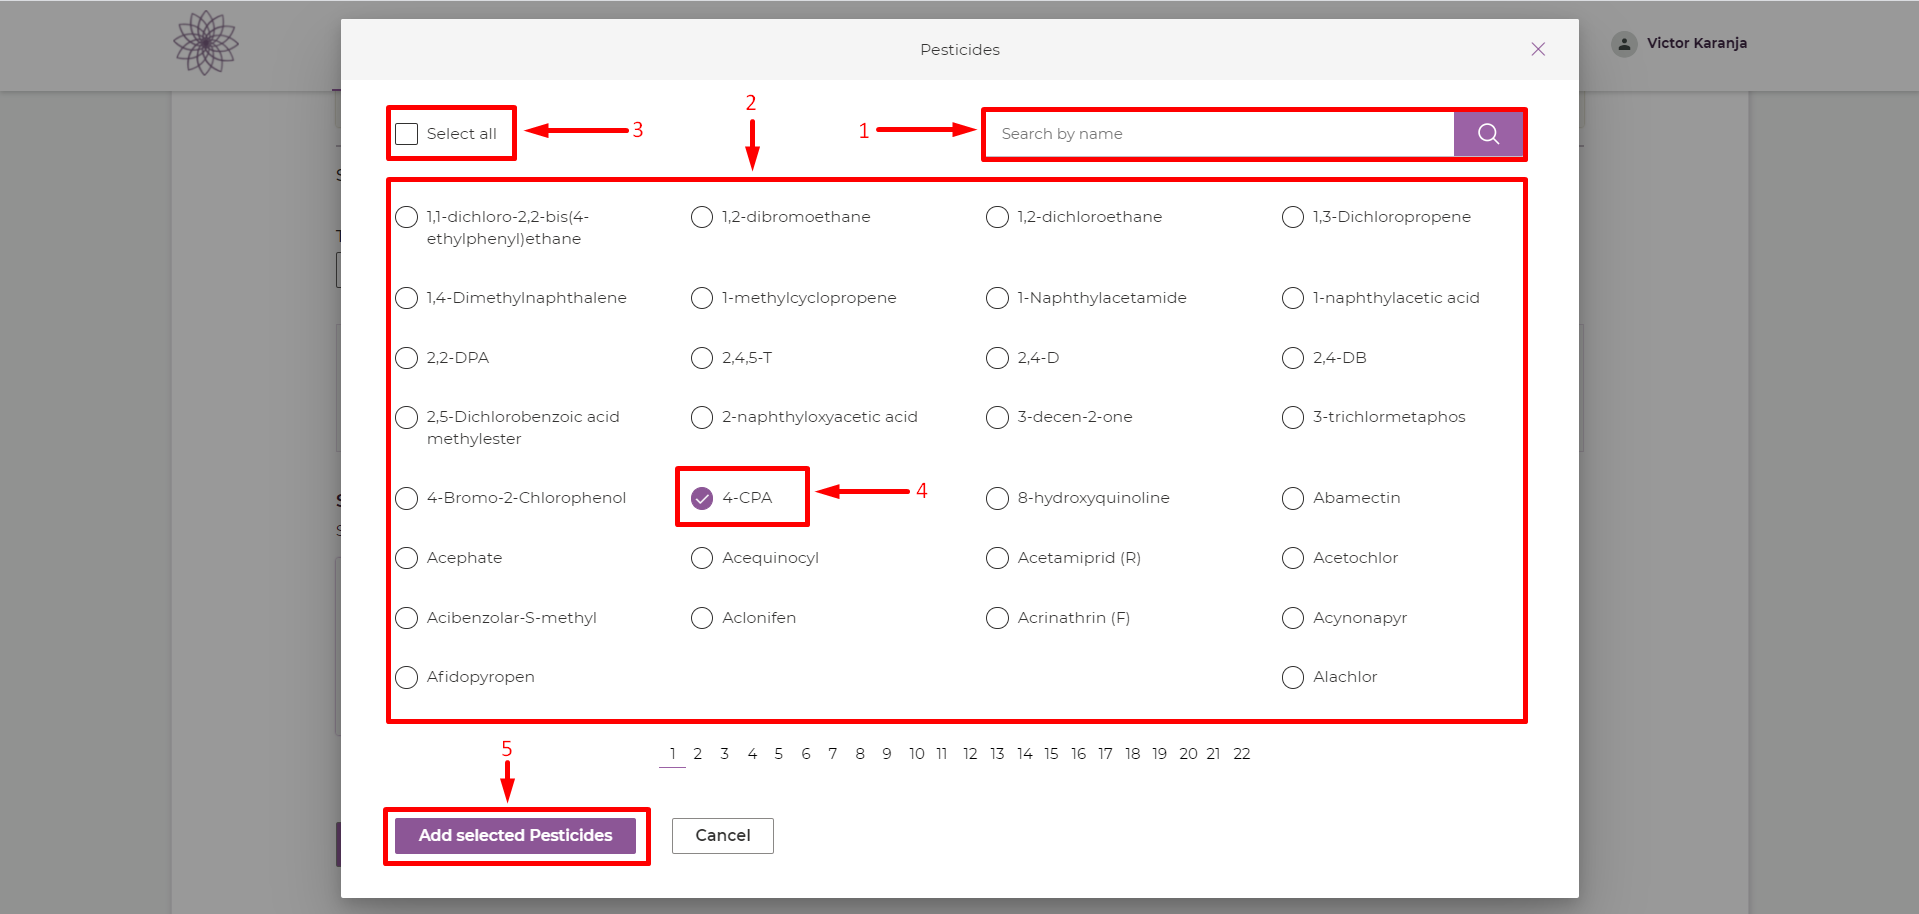
- (1) This is where you can search for individual substances.
- (2) This is where substances in the selected category will appear.
- (3) Click on this to select all the substances in this category.
- (4) Click on the substance that you want to be included in the template, selected substances will be indiciated by this active checkmark.
- (5) Once you are done, click on Add Selected [Category] to add the selected substances into the template.
Saving Template#
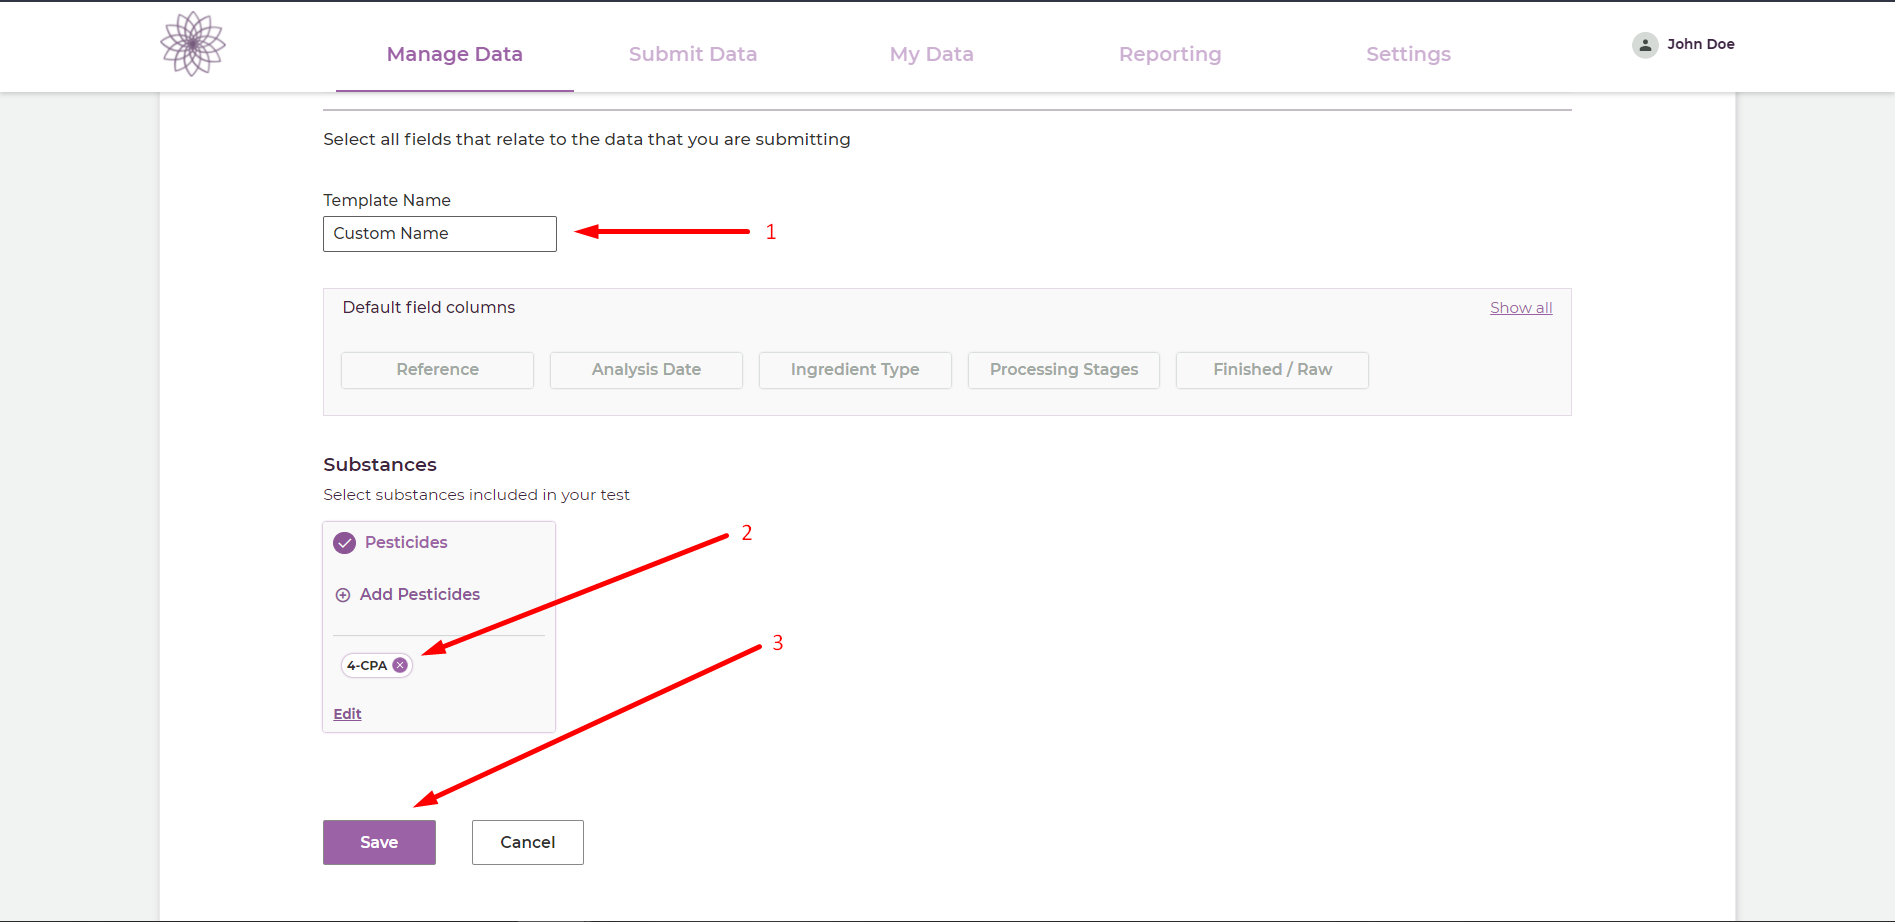
- (1) Make sure to add a custom name that will help you identify this template.
- (2) This will give you a summary of the selected substances.
- (3) Click on Save to create the custom template.